Delegating your domain to new name servers means transferring the authority for managing your domain’s DNS records to another set of DNS servers. Once you change your name servers, all DNS records for your domain must be managed on the new name servers for your website and services to work correctly.
What Does Changing Name Servers Do?
-
When you update your domain’s name servers (for example, to ns123.example.com), all DNS queries for your domain will be directed to those new servers.
-
You must set up all necessary DNS records (such as A, MX, and CNAME) on the new name servers to ensure your domain functions as expected.
Step 1 - Log into your Client Area
Step 2 - Click on Domains.
Step 3 - Click on the Domain you want to change / update the Nameservers for.
Step 4 - Click on 'Nameservers'.
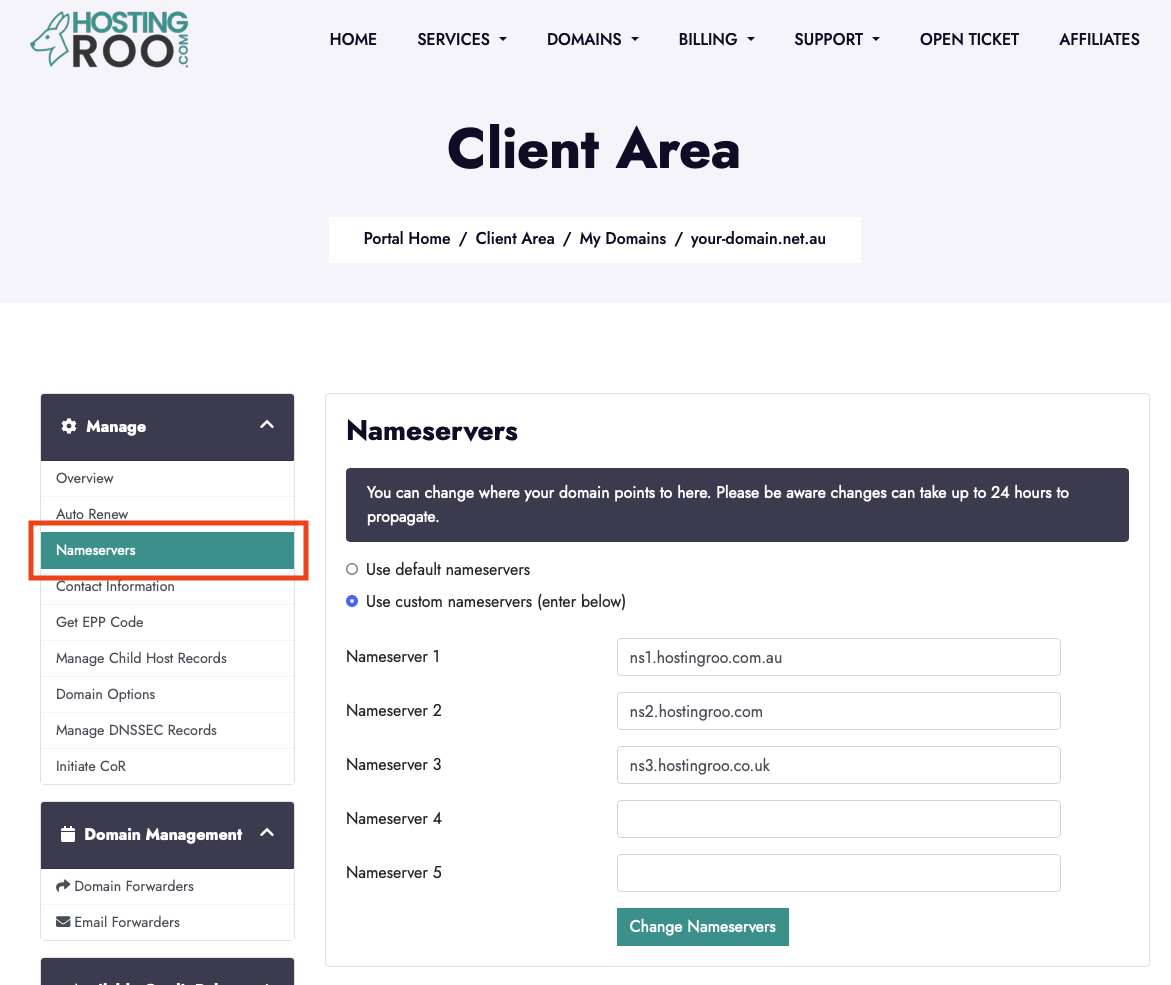
Step 5 - To use our default Nameservers to connect your domain to our cPanel shared hosting, check 'Use default nameservers' and 'Change Nameservers'.
To use your own Nameservers, check 'Use custom nameservers (enter below)' then add the required Nameservers, then 'Change Nameservers'.
NB: Please be aware changes can take up to 24 hours to propagate.
For more advanced users, here is a simplified version:
Changing Name Servers
Delegating your domain to new name servers transfers control of your DNS records to another provider. Once updated, all records (A, MX, CNAME, etc.) must be set up on the new servers for your domain and services to work correctly.
Steps:
-
Log in to your Client Area.
-
Go to Domains and select the domain.
-
Click Nameservers.
-
Choose either:
-
Use default nameservers (for HostingRoo’s cPanel hosting), or
-
Use custom nameservers (enter your own).
-
-
Click Change Nameservers to confirm.
Important Notes:
-
DNS changes can take up to 24 hours to fully propagate.